
Source Code, Tools, Developer Notes and Performance Metrics
landenlabs.com
 |
UrlCleaner C# source code and executables (xp32/64 net3.5 vs2010): See related program Visual Studio Cleaner. |
UrlCleaner is a (URL) Uniform Resource Locator shortcut Cleaner.
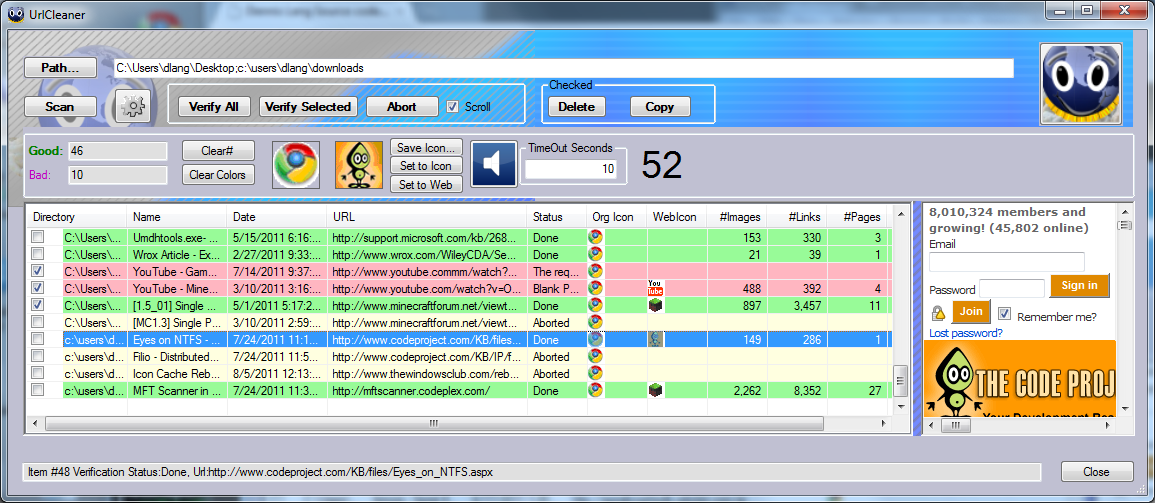
A URL shortcut is a file created when you drag a webpage URL to your desktop. Since I frequently switch browsers, I have avoided the complexity of using each browser's 'bookmark' or 'favorites' management system. Instead, I just drag the webpage address bar from my browser to the desktop and it creates a URL shortcut file. Later, I can click on URL shortcut and it reopens the page using the current default browser. If I switch my default browser, the URL shortcuts all switch to using the new default browser. You can organize your URL shortcuts, just like regular files by creating folders and drag and dropping them to move them around.

TopMain Features:
Scan disk for *.url files using directories provided by user. Extact URL resource from .url file. Verify if one or more URLs can load a webpage or designated resource. Summaries resources available from web-pages loaded by url. Easy sorting and selection of URL shortcuts, so they can be deleted or copied to another location via drag&drop. Display icon used on the desktop and icon associated with webpage. Allow web page icon to be saved to disk or used to reset the shortcut's desktop icon. Other Feaures:
- Icon class to save 32bit icons.
- Icon class to extract icons from resources.
- Ini class to read and write data from/to URL shortcut files, provided by: Prashant Khandelwal
- Delete files to Recyle Bin provided by: Microsoft
- Multi-column Listview sorting.
- Play sound '.wav' file on verification success and failure.
- Find dialog to allow searching of ListView display.
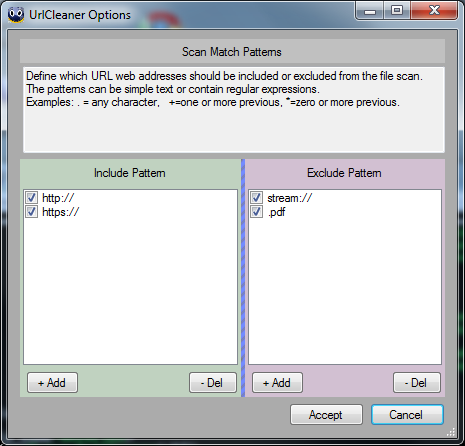
 button to define your valid URL patterns.
Verification can be slow depending on your network speed and the website speed the URL points to. Verification is accomplished by:

If you press the gear  button, the Options dialog will appear. Here you define text patterns in the URL string.
There is a column for URLs to Include and Excludee. I recommend you exclude URLs which point directly to a data file. If you don't exclude
these links, everytime you Verify the URL, it will download another copy of the resource.
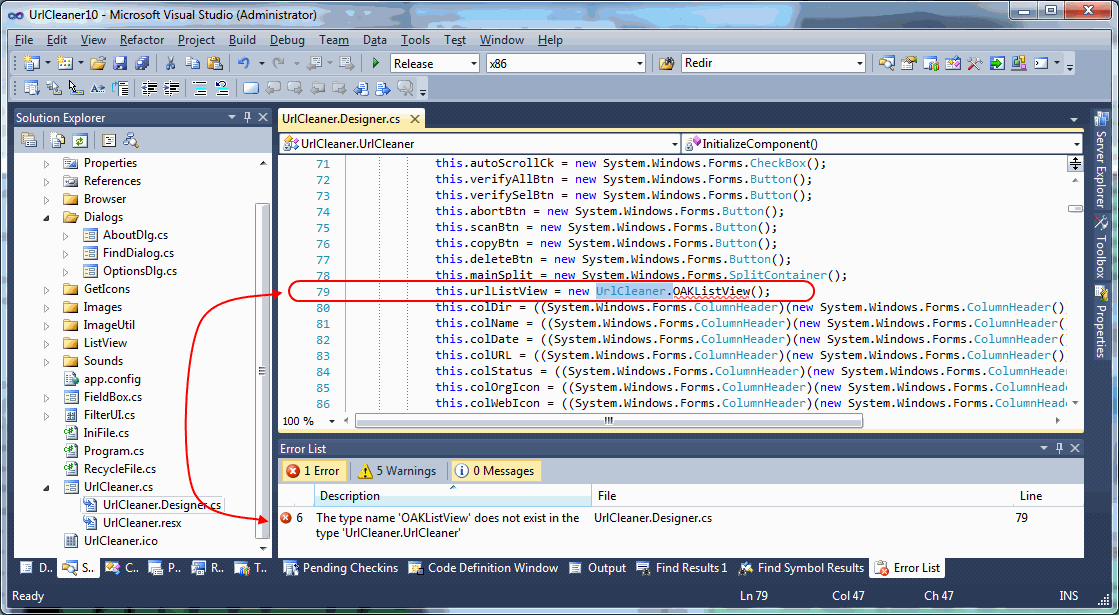
The type name 'OAKListView' does not exist in the type 'UrlCleaner.UrlCleaner'
    Before:
      this.urlListView = new UrlCleaner.OAKListView();

    After:
      this.urlListView = new OAKListView();
Example of Visual Studio Compiler Error. Resolve by deleting "UrlCleaner." in front of OAKListView. Visual Studio will randomly replace this namespace so it is a constant battle to fix it.
    static public void SaveBitmapAsIcon(Bitmap bitmap, Stream outputStream)
    {
        BinaryWriter writer = new BinaryWriter(outputStream);
        SaveBitmapAsIcon(bitmap, writer);
        writer.Flush();
    }
In general the FAVicon is tied to a LINK and has the reference name "shortcut icon" or "icon". Given a webpage document, here is my method to extract the FAVorite Icon.
/// <summary>
/// Extract "Shortcut Icon" from web document.
/// </summary>
/// <param name="image">Return Icon image</param>
/// <param name="uriPath">Return Icon URI</param>
/// <returns></returns>
private bool RetrieveUrlImage(out Image image, out string uriPath)
{
    uriPath = string.Empty;

    try
    {
        HtmlDocument doc = webBrowser.Document;
        HtmlElementCollection collect = doc.GetElementsByTagName("link");

        foreach (HtmlElement element in collect)
        {
            string linkRelStr = element.GetAttribute("rel");

            if (string.Compare(linkRelStr, "SHORTCUT ICON", true) == 0 ||
                string.Compare(linkRelStr, "ICON", true) == 0)
            {
                string iconPath = element.GetAttribute("href");
                uriPath = iconPath;

                if (Uri.IsWellFormedUriString(uriPath, UriKind.Relative))
                    uriPath = "http://" + UriCombine(webBrowser.Url.Host, iconPath);

                WebRequest requestImg = WebRequest.Create(uriPath);
                image = Image.FromStream(requestImg.GetResponse().GetResponseStream());
                return true;
            }
        }
    }
    catch (Exception ex)
    {
        statusTx.Text = ex.Message + " " + uriPath;
    }

    image = null;
    return false;
}
Here samples of two of my .url files. The key parts is the URL tag defines the resource and the IconFile and IconIndex define the icon to drawn on the desktop.
[{000214A0-0000-0000-C000-000000000046}] Prop3=19,0 [InternetShortcut] URL=steam://rungameid/34330 IDList= IconFile=C:\Program Files (x86)\Steam\steam\games\71a76cd2fbcd1457887fe57727aa10e5e1ce2ea4.ico IconIndex=0[InternetShortcut] URL=http://technet.microsoft.com/en-us/library/cc723564.aspx
/// <summary>
/// Delete file or directory by placing it in recycle bin so it can undone.
///
/// A deleted code example can be found:
/// http://social.msdn.microsoft.com/Forums/hu-HU/netfxbcl/thread/ce1e8a4a-dd6b-4add-84d1-95faa3d13404
/// </summary>
class RecycleFile
{
    [StructLayout(LayoutKind.Sequential, CharSet=CharSet.Auto, Pack=1)]
        public struct SHFILEOPSTRUCT
    {
            public IntPtr hwnd;
            [MarshalAs(UnmanagedType.U4)] public int wFunc;
            public string pFrom;
            public string pTo;
            public short fFlags;
            [MarshalAs(UnmanagedType.Bool)] public bool fAnyOperationsAborted;
            public IntPtr hNameMappings;
            public string lpszProgressTitle;

    }

    [DllImport("shell32.dll", CharSet=CharSet.Auto)]
    static extern int SHFileOperation(ref SHFILEOPSTRUCT FileOp);
    const int FO_DELETE = 3;
    const int FOF_ALLOWUNDO = 0x40;
    const int FOF_NOCONFIRMATION = 0x10;    //Don't prompt the user.;

    /// <summary>
    ///     Delete file or directoy by moving it to the recycle bin.
    ///     return true if successful.
    /// </summary>
    static public void DeleteFile(string path)
    {
        SHFILEOPSTRUCT shf = new SHFILEOPSTRUCT();
        shf.wFunc = FO_DELETE;
        shf.fFlags = FOF_ALLOWUNDO | FOF_NOCONFIRMATION;
        shf.pFrom = path + '\0' + '\0';

        int zeroOk = SHFileOperation(ref shf);

        if (zeroOk != 0)
            throw new FileNotFoundException("Delete failed", path);

    }
}
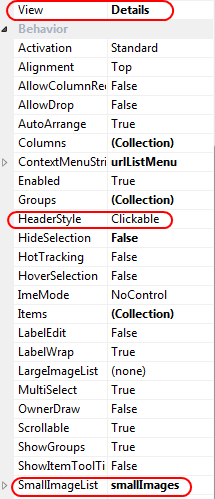
I love to use the ListView container, but it does not have a built-in column sorter. Sorting is handle by setting ListView's sorter to your own sort method. My ListView column sort method is in the ListViewColumnSorter.cs file.
To use the sort you:
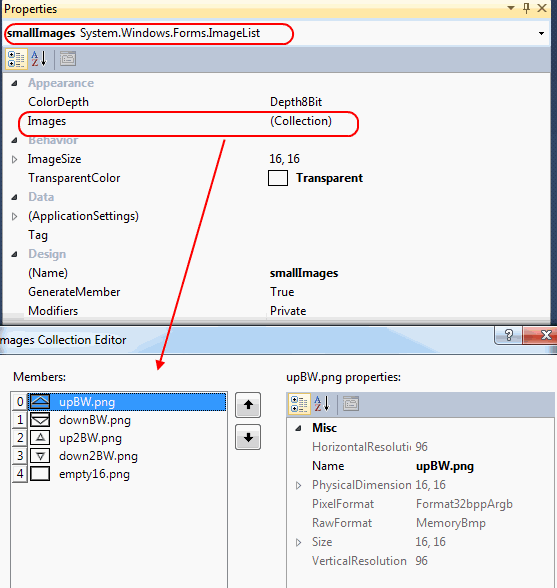
1. Make sure ListView HeaderStyle is Clickable, which is the default.
2. Create and assign an ImageList to the SmallImageList resource of the ListView.
3. Add Arrow images to ImageList
 | 
|
urlListView.ListViewItemSorter = new ListViewColumnSorter(ListViewColumnSorter.SortDataType.eAuto);
This implementation of ColumnSort will allow two columns to define the sort order. As you click a column it becomes the primary sort column and any previous sort column becomes the secondary sort if the first column has a duplicate.
/// <summary>
/// Column header click fires sort.
/// Supports two tier sorting.
/// </summary>
private void ColumnSort_Click(object sender, ColumnClickEventArgs e)
{
    bool isControl = System.Windows.Forms.Control.ModifierKeys == Keys.Control;

    ListView listView = sender as ListView;
    ListViewColumnSorter sorter = listView.ListViewItemSorter as ListViewColumnSorter;
    if (sorter == null)
        return;

    // Determine if clicked column is already the column that is being sorted.
    if (e.Column == sorter.SortColumn1)
    {
        // Reverse the current sort direction for this column.
        if (sorter.Order1 == SortOrder.Ascending)
            sorter.Order1 = SortOrder.Descending;
        else
            sorter.Order1 = SortOrder.Ascending;
    }
    else
    {
        // Set the column number that is to be sorted; default to ascending.
        sorter.SortColumn2 = sorter.SortColumn1;
        sorter.Order2 = sorter.Order1;
        sorter.SortColumn1 = e.Column;
        sorter.Order1 = SortOrder.Ascending;
    }

    // Clear old arrows and set new arrow
    foreach (ColumnHeader colHdr in listView.Columns)
        colHdr.ImageIndex = 4;

    if (sorter.SortColumn1 != sorter.SortColumn2)
        listView.Columns[sorter.SortColumn2].ImageIndex = (sorter.Order2 == SortOrder.Ascending) ? 2 : 3;

    listView.Columns[sorter.SortColumn1].ImageIndex = (sorter.Order1 == SortOrder.Ascending) ? 0 : 1;

    sorter.SortCheckedState = (isControl && sorter.SortColumn1 == 0);

    sorter.SortType =
        (listView.Columns[sorter.SortColumn1].TextAlign == HorizontalAlignment.Right) ?
        ListViewColumnSorter.SortDataType.eNumeric :
        ListViewColumnSorter.SortDataType.eAlpha;

    // Perform the sort with these new sort options.
    if (listView != null)
        listView.Sort();
}

/// <summary>
/// Play a sound.  Ignore play if recently played.
/// </summary>
/// <param name="sounds"></param>
private void PlaySound(Sounds sounds)
{
    if (!this.m_mute)
    {
        this.m_sndPlayer.Stream = Properties.Resources.bad;
        switch (sounds)
        {
            case Sounds.eAbort:
            case Sounds.eFail:
                this.m_sndPlayer.Stream = Properties.Resources.bad;
                break;
            case Sounds.eGood:
                this.m_sndPlayer.Stream = Properties.Resources.good;
                break;
        }

        if ((DateTime.Now - m_lastPlay).Duration().TotalSeconds > 2)
        {
            this.m_sndPlayer.Play();
            m_lastPlay = DateTime.Now;
        }
    }
}
If you have a lot of URL Shortcuts, it is handy if you can search the list and find a specific object. I created a basic Find Dialog which should pop-up if you type Control-F thou it seems to be a little lazy to open sometimes.
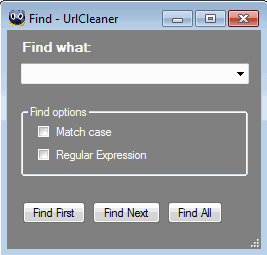
Here is the logic which opens the Find Dialog:
private void UrlCleaner_KeyUp(object sender, KeyEventArgs e)
{
    switch (e.KeyCode)
    {
        case Keys.F:    // Launch Find dialog in response to control-f.
            if (e.Control)
                findMenu_Click(sender, EventArgs.Empty);
            break;
        case Keys.F3:
            Find(urlListView, findInfo, new FindDialog.FindEventArgs() { action = FindDialog.FindEventArgs.Action.Next });
            break;
    }
}
Here are all of the Find methods which manage the search logic:
private void findMenu_Click(object sender, EventArgs e)
{
    findDialog.GetArgs.action = FindDialog.FindEventArgs.Action.First;
    findDialog.Show();
}

private void findAgainMenu_Click(object sender, EventArgs e)
{
    findDialog.GetArgs.action = FindDialog.FindEventArgs.Action.First;
    if (findDialog.GetArgs.toFind.Length == 0)
        findDialog.Show();
    else
        findDialog_findEventHandler(null, findDialog.GetArgs);
}

void findDialog_findEventHandler(object sender, FindDialog.FindEventArgs e)
{
    Find(this.urlListView, findInfo, e);
}

void Find(ListView listView, FindInfo findInfo, FindDialog.FindEventArgs e)
{
    if (e.action == FindDialog.FindEventArgs.Action.First)
    {
        listView.SelectedIndices.Clear();
        findInfo.index = -1;
    }
    else if (e.action == FindDialog.FindEventArgs.Action.All)
    {
        listView.SelectedIndices.Clear();
        findInfo.index = -1;
        while ((findInfo.index = FindMatch(this.urlListView, e, findInfo.index)) != -1)
        {
            listView.EnsureVisible(findInfo.index);
            listView.SelectedIndices.Add(findInfo.index);
        }

        if (listView.SelectedIndices.Count != 0)
            PlaySound(Sounds.eGood);
        else
            PlaySound(Sounds.eFail);

        return;
    }

    // Search ListView.
    findInfo.index = FindMatch(this.urlListView, e, findInfo.index);
    if (findInfo.index == -1)
    {
        MessageBox.Show("No Match for:" + e.toFind);
        PlaySound(Sounds.eFail);
    }
    else
    {
        PlaySound(Sounds.eGood);
        listView.EnsureVisible(findInfo.index);
        listView.SelectedIndices.Add(findInfo.index);
    }
}

public static bool Contains(string source, string toCheck, bool isMatchCase, bool isRegularExpression)
{
    if (isRegularExpression)
        return Regex.IsMatch(source, toCheck, isMatchCase ? RegexOptions.None : RegexOptions.IgnoreCase);
    else
        return source.IndexOf(toCheck, isMatchCase ? StringComparison.Ordinal : StringComparison.OrdinalIgnoreCase) >= 0;
}


/// Find a match, starting search just after previous match.
/// </summary>
/// <param name="listView"></param>
/// <param name="e"></param>
/// <param name="prevIndex"></param>
/// <returns>Matching row index or -1 on failure</returns>
int FindMatch(ListView listView, FindDialog.FindEventArgs e, int prevIndex)
{
    int index = prevIndex;
    while (++index < listView.Items.Count)
    {
        ListViewItem lvItem = listView.Items[index];
        for (int colIdx = 0; colIdx != lvItem.SubItems.Count; colIdx++)
        {
            if (lvItem.SubItems[colIdx] != null &&
                Contains(lvItem.SubItems[colIdx].Text, e.toFind, e.isMatchCase, e.isRegularExpression))
                return index;
        }
    }

    return -1;
}
